


How to Erase Data Before Selling a Computer
Selling an old computer can be a good way to recover some money, but handing it over with your personal files still on it can create a serious privacy problem. Simply deleting files or moving them to the Recycle Bin does not fully remove them from the drive.
Before selling, giving away, or recycling a computer, you should properly erase the data stored on its internal drive. This includes documents, photos, videos, saved passwords, browser data, emails, downloads, and other private information.
In this guide, we will explain how to erase data before selling a computer using simple and safe methods.
Why Should You Erase Data Before Selling a Computer?
A computer can contain years of personal and work-related information. Even after deleting files, some data may remain on the storage drive.
Before selling your computer, check for:
- Personal documents
- Photos and videos
- Saved browser passwords
- Downloaded files
- Email data
- Financial documents
- Tax records
- Work files
- Chat backups
- Login details
- Personal software data
If this information is left behind, the next owner may be able to access it.
Therefore, it is important to erase the data properly instead of simply deleting individual files.
What to Do Before Erasing Your Computer
Before permanently erasing the drive, make sure you have copied anything you want to keep.
- Back Up Important Files
Move your important files to another computer, external hard drive, USB drive, or trusted cloud storage.
Check folders such as:
- Desktop
- Documents
- Downloads
- Pictures
- Videos
- Music
Also check application folders where you may have saved important data.
- Sign Out of Your Accounts
Sign out of your personal accounts before selling the computer.
For example, check:
- Microsoft account
- Google account
- Email accounts
- OneDrive
- Dropbox
- Other cloud services
- Web browsers
If you use a password manager, make sure your account is removed from the computer.
- Remove External Storage
Do not forget to remove:
- USB drives
- SD cards
- External hard drives
- DVDs
- Other storage devices
These devices may also contain personal information.
Method 1: Reset the Windows Computer
If you are using Windows 10 or Windows 11, you can use the built-in reset option.
Step 1: Open Settings
Go to:
Settings → System → Recovery
Step 2: Select Reset This PC
Click Reset PC.
Windows will provide different options.
Step 3: Choose Remove Everything
Select:
Remove everything
This removes your personal files, applications, and settings from the Windows installation.
Step 4: Choose How You Want to Reinstall Windows
Windows may provide options such as downloading Windows from the cloud or reinstalling it from existing files.
Choose the option that works for your situation.
Step 5: Check the Drive Cleaning Option
Depending on your Windows version and system configuration, you may see an option related to cleaning the drive or removing data more thoroughly.
If you are selling or giving away the computer, select the option intended for removing data from the drive rather than keeping the computer for your own use.
Step 6: Start the Reset
Review the information shown by Windows and start the reset.
The process can take some time. Do not turn off the computer while it is running.
Important: A Windows reset is convenient, but users who need a more dedicated data-erasure process may prefer a data wiping tool.
Method 2: Erase the Drive With Data Wipe Software
If you want to permanently erase data before selling a computer, dedicated data wipe software can provide more control over the erasure process.
A data wipe tool can be used to wipe a complete hard drive or other supported storage device instead of manually deleting files one by one.
For example, SysTools Data Wipe Software can be used when you need to erase data from storage devices before disposal, resale, or handover.
How to Erase Computer Data With Data Wipe Software
The general process is simple:
Step 1: Install the Data Wipe Tool
Download and install the data wiping software on the computer.
Step 2: Select the Drive
Open the software and select the hard drive or storage device that you want to erase.
Be very careful while selecting the drive. Make sure it is the correct drive because the wiping process can permanently remove its data.
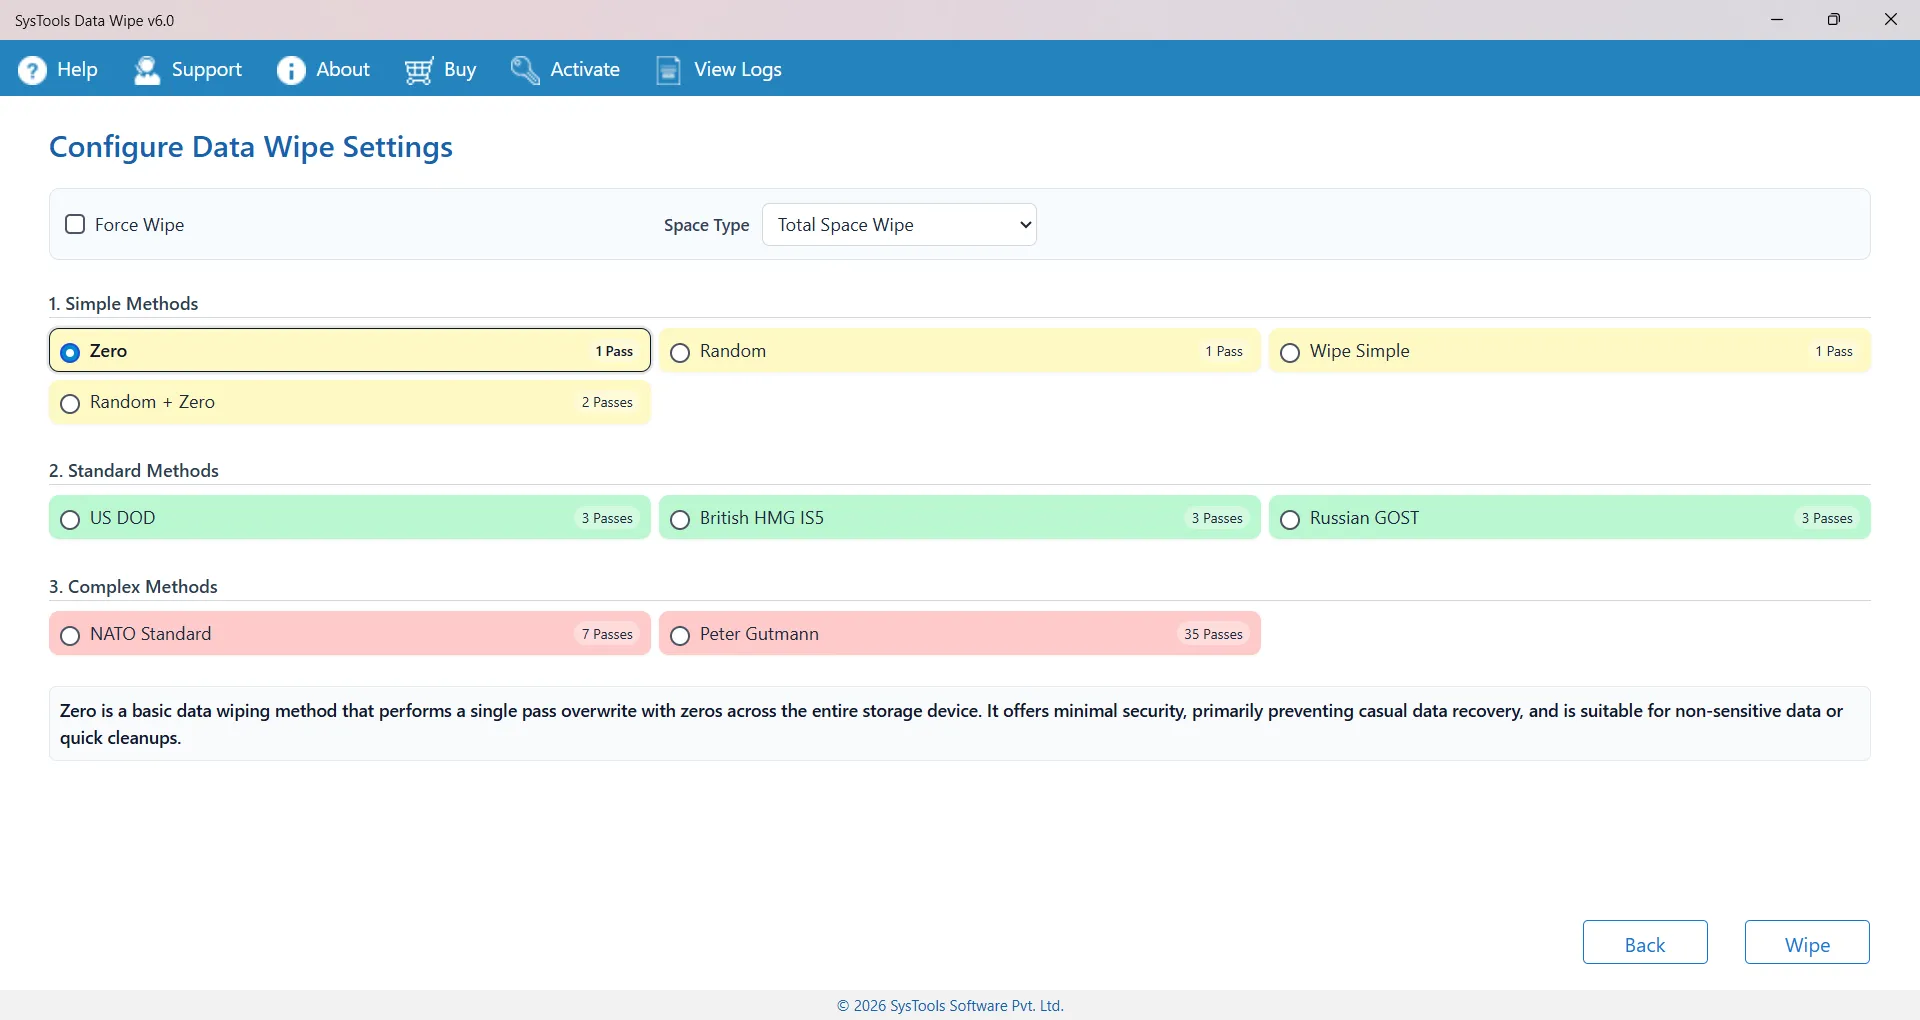
Step 3: Select a Wiping Method
Choose an available data wiping method according to your requirement.
Different wiping methods may perform different numbers of overwrite passes.
Step 4: Start the Wiping Process
Start the wipe after checking the selected drive and settings.
The software will erase the data from the selected storage device.
Step 5: Generate an Erasure Report
After the wiping process is complete, generate and save the report if the software provides this option.
This can be useful as a record that the drive was wiped before the computer was sold or handed over.
Is Deleting Files Enough Before Selling a Computer?
No.
Deleting a file normally does not mean that all traces of the file have immediately disappeared from the storage device.
For this reason, do not rely only on:
- Pressing Delete
- Emptying the Recycle Bin
- Formatting the drive
- Deleting your user account
- Removing a few folders
If the computer is going to another person, use a proper reset or data-erasure process.
What About Formatting the Hard Drive?
Formatting removes the existing file system information and makes the drive available for reuse. However, quick formatting should not be treated as the same thing as securely erasing all previous data.
If your main goal is protecting personal information before selling the computer, use a suitable data-erasure method rather than relying only on a quick format.
SSD vs HDD: Does It Matter?
Yes.
Modern computers may use either an HDD or SSD. The way data is handled can be different between these storage types.
For an HDD, data wiping methods can overwrite areas of the drive.
For an SSD, the storage controller and features such as wear leveling mean that ordinary overwrite methods do not always work in exactly the same way.
Therefore, check whether your computer uses an HDD or SSD and choose an erasure method that supports that type of storage.
What Should You Check After Erasing the Computer?
Before handing over the computer, check that:
- Your important files have been backed up.
- Your accounts have been signed out.
- External storage has been removed.
- The correct internal drive was selected.
- The data-erasure process has finished.
- Any available erasure report has been saved.
- The computer no longer contains your personal information.
If you are selling the computer, you can then prepare it for the new owner.
Final Words
Knowing how to erase data before selling a computer is important for protecting your personal information. Do not assume that deleting files or emptying the Recycle Bin is enough.
For a Windows computer, you can start with the built-in Reset this PC option and choose the appropriate setting for removing your data. If you need a dedicated method for wiping a drive, data wipe software can provide additional control and an erasure report.
Most importantly, back up your important files first and double-check the selected drive before starting any permanent erasure process. Once the wiping process begins, the removed data may not be recoverable.

 English
 Arabic
 French
 Spanish
 Portuguese
 Deutsch
 Dutch
Dutch
 Italiano
 Russian
 Romaian
 Portuguese (Brazil)
 Greek
Greek
 Bengali